Showing posts with label Baking with kids. Show all posts

Friday, November 8, 2013

Farm theme cake


Happy Friday!! I hope you all had a great week. 
My week has been fantastic, I have been able to catch some sleep, organize my baking supplies/tools and watching movies with the girls almost every night. Can't ask for a better way to spend my extra time.

For today's cake I have this adorable Farm theme cake I made for two little boys.They are twins and were turning one and their mom planned a big party.  I love making cakes for little boys, and I love even more when I have the freedom to do anything I want, I always do more than expected ,
 specially for my regular clients.


I used all the techniques I learned on my Crafty class-Animal cake toppers and I added a few more of my own.
For the grass I used green stiff royal icing with a Wilton grass tip.
To make the hay I used my clay gun.
 All the animals were made using Wilton fondant.
 These are the little smash cakes, love them!!
 Compare their size with a fork, so tiny!!

 Big hugs for the cake pops makers!!! I had to make a lot of cake pops and ohh boy!! that is a lot of work.
Have a great weekend!!

Thursday, October 24, 2013

Cake Topper Techniques: Fondant Animals-Craftsy Class Review

Craftsy offers online crafting classes taught by acclaimed instructors who love craft as much as we do. That's one of the reasons that I have gotten many of  Craftsy's cake decorating classes. With my busy schedule, the kids and working full time I need classes that are available to me any time and that I can watch according to my own schedule. Besides, more than taking the classes online, they do have a platform where you can ask questions to the instructors, upload photos of my projects and interact with other members.
Given the opportunity of reviewing one of their classes, I decided to take the Cake Topper Techniques: Fondant Animals


This Craftsy class was led by Sharon Wee, an Australian cake decorator, which I never heard of but after a quick search I found her work so beautiful and her very talented skills making fondant toppers.
The class teaches how to make a cow, pig,teddy bear, bunny, love birds,bee,ladybug, penguins and a cute little ducky with fondant. In the first part, she teaches how to make basic shapes like balls, oval, cone and tear drop shapes. I have to say that the animal toppers in this class are made using techniques suitable for beginners, which is the perfect class to take for people who want to start learning basic figures to move into a more detailed and advanced cake toppers.
Even though I consider myself an experienced cake decorator,I always find it interesting to see other people working with different techniques and I am always open to new ways of doing things. I was not disappointed with this class at all. Personally, I have always had problems when it comes to proportion for my fondant figures and I finally was able to learn how to cut and size the proper amount of fondant for each part of the body.
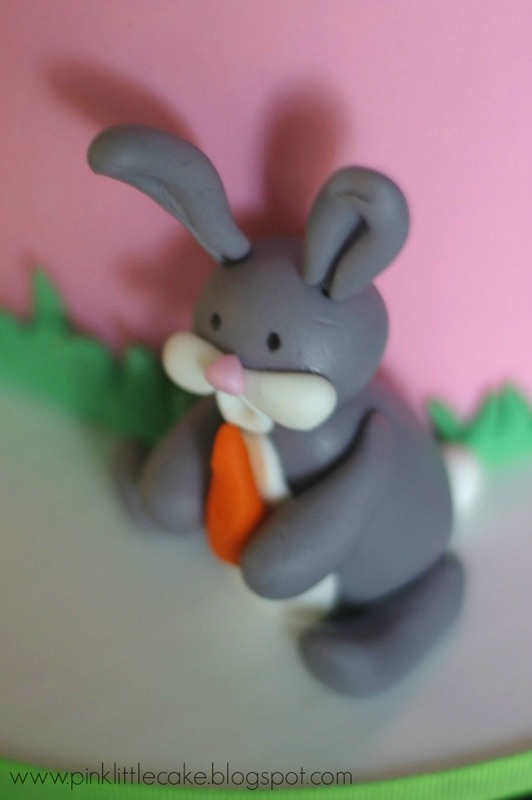
Sharon provides clear and easy to follow instructions and methods for creating every fondant figurine. In lesson 2 you will start making simple figurines, like the ducky that really do not need support, very simple, from there she moves into more detail toppers. I have to tell you that I made this little bunny in no time!
Something I notice is that the instructor assumes that you have some experience working with fondant and you are aware of terms like CMC and Tylose, as well as handling fondant so it doesn't get dry when leaving out.  But honestly having to work with fondant before is not something that you need to know for this class.
From lesson 5 and on, you will learn how to make fondant toppers with movement, which I found very easy to make using pretty much egg and tear drop shapes.Of course, be aware that this toppers need support and time to dry , so you won't be able to finish the topper at once.

I thoroughly enjoyed this class and the time she took to make each topper , since I am a very visual-kind of like to take my time -person.  I was pleased to pick up new techniques, specially when it comes to proportions of the body.

I highly can recommend this class,like I said before, great for beginners and useful for experienced cake decorators. Sharon will teach you the tips and trick to make the animal cake toppers that you have always wanted to make and thought were very difficult.
Craftsy can turn your cake ideas in reality, right there in your own home and at your own time. From fondant to isomalt and modeling chocolate, Craftsy Cake Decorating courses are taught by the best instructors from around the world.
Click here to receive 25% off your first Cake Decorating course with Craftsy!


This is a sponsored conversation written by me on behalf of Craftsy. The opinions and text are all mine.

Tuesday, October 8, 2013

Sesame Street Cake for my little one 2nd Birthday


Happy Wednesday. Believe it or not I am still recovering from a busy weekend. My little baby turned 2 last Saturday. She is not technically a baby anymore but I still have to call her baby. She doesn't sleep at night, literally. I have done everything and anything. She has a lot of anxiety and tents to make me a little desperate anxious.
She is also the most adorable little girl ever and has such a deep display of love for all of us.She is such a blessing in our lives.

I wasn't thinking about having a big birthday party, just a little cake for us. Cami was schedule for a dental extraction on Monday and I had been so stress about it for weeks that a big birthday party was the last thing in my mind.

 But then the mommy guilt comes  ( do you actually get that if you have more than one kid?)and I started printing party decorations, making a big cake and all of the sudden I was planning a big birthday party in 2 days.


Any way. The baby loves Elmo, very typical on a 2 year old. So I made her a Sesame Street theme cake, I took the cake letter's idea from Juanita, she made a cake for her little one also around the Sesame Street theme.

Cookie Monster and Elmo were made in 20 minutes, I definitely have to do some practice with Cookie Monster has he didn't turned out how I wanted. Of course my little one was crazy over it and love it.


And this is my first try with Abby Cadabby full body cookie. Always room for a better cookie in the future. 

 Super cute and affordable little printables from an Etsy shop.
And then there was a very tired mommy.
Hope you all are having a great weekend.

Friday, August 23, 2013

Rainbow Cake-Cami's Style


This past weekend we celebrated my little one's 6th birthday-insert tears here-

A few months ago, we talked about her party theme and whether to have the party at home or somewhere else. Having a party at home is definitely cheaper, I love the fact that I can make adult and kids food. Meanwhile at a gym or indoor playground I feel so limited with the only pizza and soda option they have, unless you want to pay an arm and leg for other food options, which I totally refuse.

 Any way, Cami decided that she wanted to have the party at a local Bouncy place. I am not a fond of the place we picked but I do not have too many options around my area. 

She told me she wanted a Rainbow party. Awesome! I have been wanting to make a rainbow cake for a long time, I imagine a 3 tier cake, layers in different colors and yummy colorful buttercream. 

I dream on making her name in sugar letters, lots of glitter and decorations. 
But as it turned out, she didn't want any of it. No glitter , no name in sugar, no big cake. 
She didn't even let me write Happy Birthday on her cake. 

She drew me a picture of the rainbow she wanted me to make, she told me she wanted a chocolate cake with pink frosting inside and brown outside ( chocolate).No fondant. 

Well, I accepted my reality ( I wasn't the one turning 6) and I made her cake.

We made the cake at home together. I absolutely love baking with my girl.
She helped me measured all the ingredients.
It's never too early to learn how to properly measure flour right? 

The beginning of the chocolate mousse

We filled the inside of the cake with Swiss Meringue Buttercream tinted Americolor Electric pink. 

The party was a success! She was the happiest girl on Earth jumping everywhere. 


I spent a good part of the party following E all over the place, talk about over stimulation.


I couldn't pass the change to make a pink cake. Nothing too complicated. Chocolate cake, nutella filling, straight from the jar, rustic leftover pink icing and sprinkles. 

Do you bake with your kids? 
Did you bake with them when they were little? 
Would love to hear about it.

Have a great weekend everyone!