While all of you are making the most beautiful Christmas cookies and yummy treats I am still stuck in the last cake orders of the year, this weekend I will finish the last orders and then I am off for a long break.
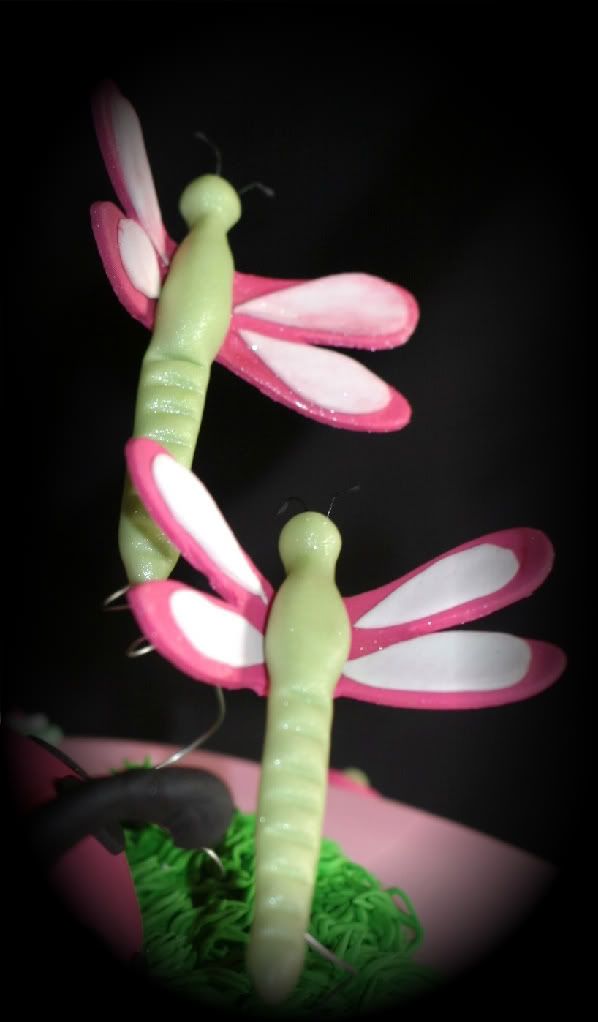
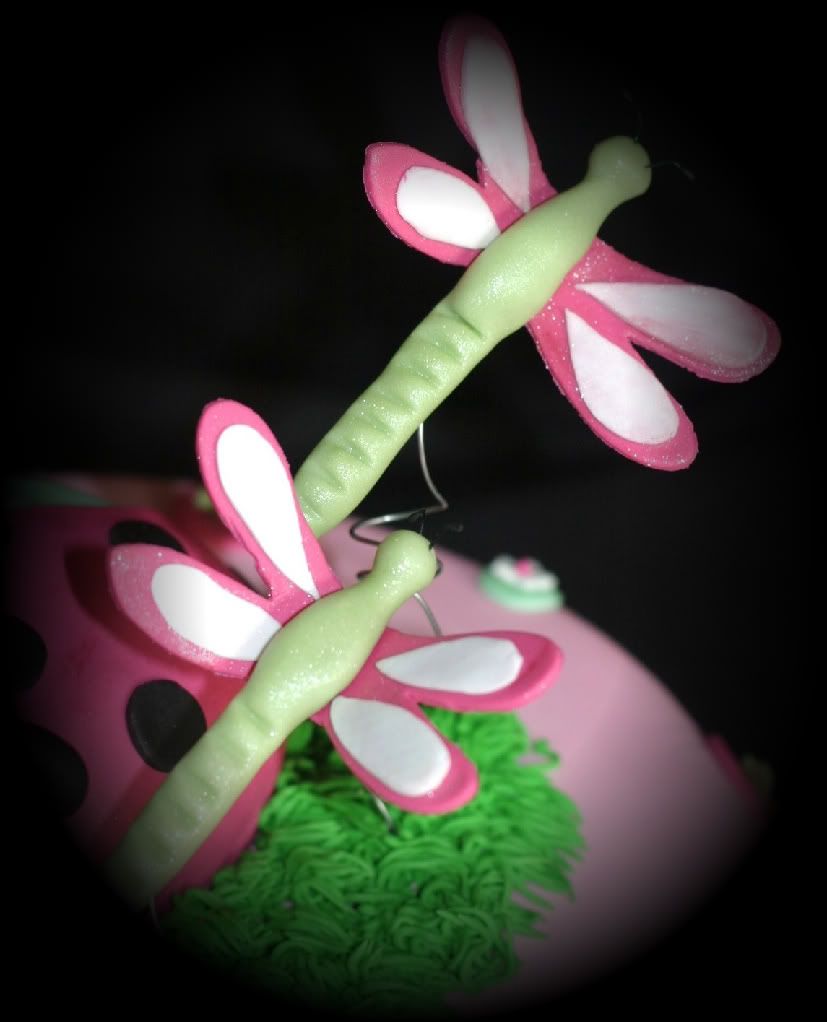
Last weekend I made a Baby Shower cake with a ladybug and dragonfly theme, and I thought the dragonflies would look really nice "flying" on top of the cake. And when I say flying... please don't think some how I put a motor under the cake the would spin around the dragonflies, my cake skills are not there yet. But I did use some wire, which I have seeing in other cake designs requiring some type of "flying" look.
For the dragonflies I used a mix of fondant and gumpaste 50%-50%
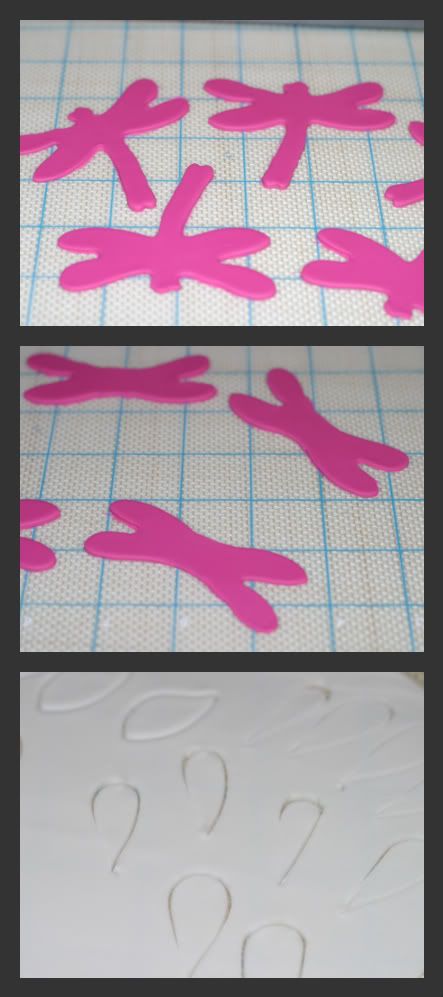
- I rolled the fondant thin and using a dragonfly cookie cutter I cut the shape of the dragonfly.
- Using an exacto knife I removed the body and the head because I wanted to do a more 3 D shape with the body.
- To bring some texture to the wings I rolled a piece of white fondant and using a knife I cut a tear drop shape, if you have a tear drop cutter feel free to use it, I just don't have it.
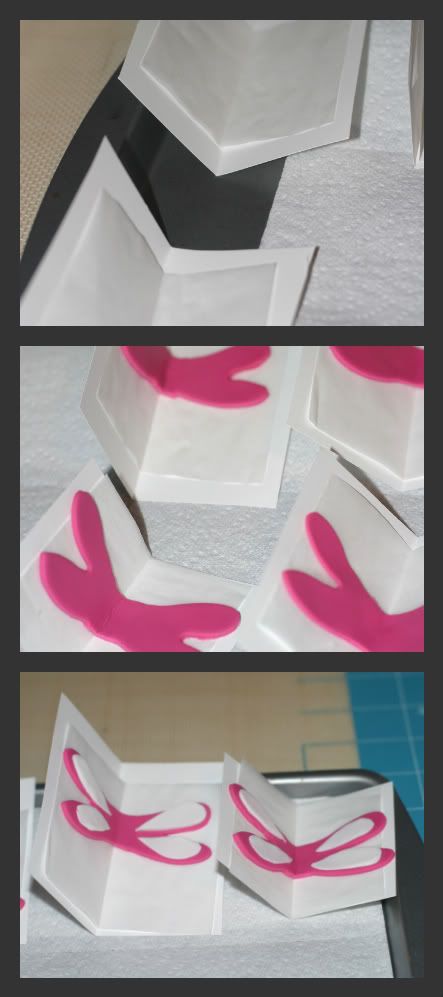
- I cut a square piece of cardboard and parchment paper to lay the dragonfly on it and give the wings some movement.
- Using a paintbrush with a dab of water I attached the white mini wing details on top of the pink wings.
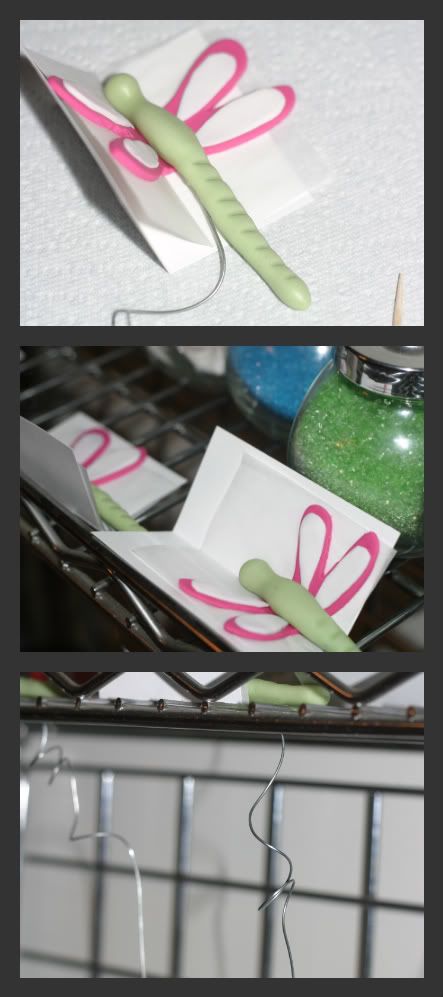
- For the dragonfly body, I just rolled a piece of fondant in a long sausage shape making sure I was forming a head and a little round belly (yes, dragonflies also have love handles)
- I used a toothpick to make indentations in the top of the body
- I attached the body to the wings with a dab of water and then I inserted an 18 gauge wire under the dragonfly body (ouch!)
- At this point the dragonfly figure was very soft, so I set it aside to dry for one day on top of my kitchen cart
I always like to dust my sugar figures with pear dust, for this one I used a shimmering pink. Well I hope you find this tutorial useful to use in one of your future cakes.
Thank you for stopping by and have a great weekend.





.JPG)





15 comments:
Very nice effect! I hope you enjoy your break! :)
This is one for the ideas book. Maybe some bumble bees for Monk's cake for his bday coming up! Nothing like bumble bees and monkeys on a cake!
They do look nice on top of the cake. I have tried butterflies, but dragonflies look nice too!
Just gave an idea for my daughter's bday.
Un saludo
very nice
Very cute... thank you for the excellent tutorial.
:)
ButterYum
Qué bonito Kathia! muchas gracias por el tutorial!
Gracias por colaborar también con María.
Besitos!
Great tutorial!....easy to follow instructions :)
________________
cakewhiz
So cute!
You deserve a break! What a busy year this has been for you. The dragon flies are adorable! I always appreciate your step by step photo tutorials! Have a great Christmas with your family Kathia!
Oh how cute! Thanks for putting together the tutorial!
Yayy a tutorial! Thanks :) The dragonfly is adorable, now I know how to make it too :)
These are great! We are a dragonfly-loving family here so maybe I can make some of these soon!
So cute!!! Gracias, Great tutorial. Will be making one soon :D
Beautiful! Thank you for the tutorial. Can't wait to make these for my mom's cake.
very nice
Post a Comment
Thank you for taking the time and leaving a comment.I really appreciate it.