


.JPG)


Happy Monday!! we are 8 days away from Christmas!! . Are you done with your Christmas baking? I am in full swing making cookies for my kid's teachers at school and daycare, nothing better than a homemade bake good. This year I am also making cakes on a jar, I have seeing them and they look so adorable that I had to make them.
What is your favorite cookie to make on Christmas?
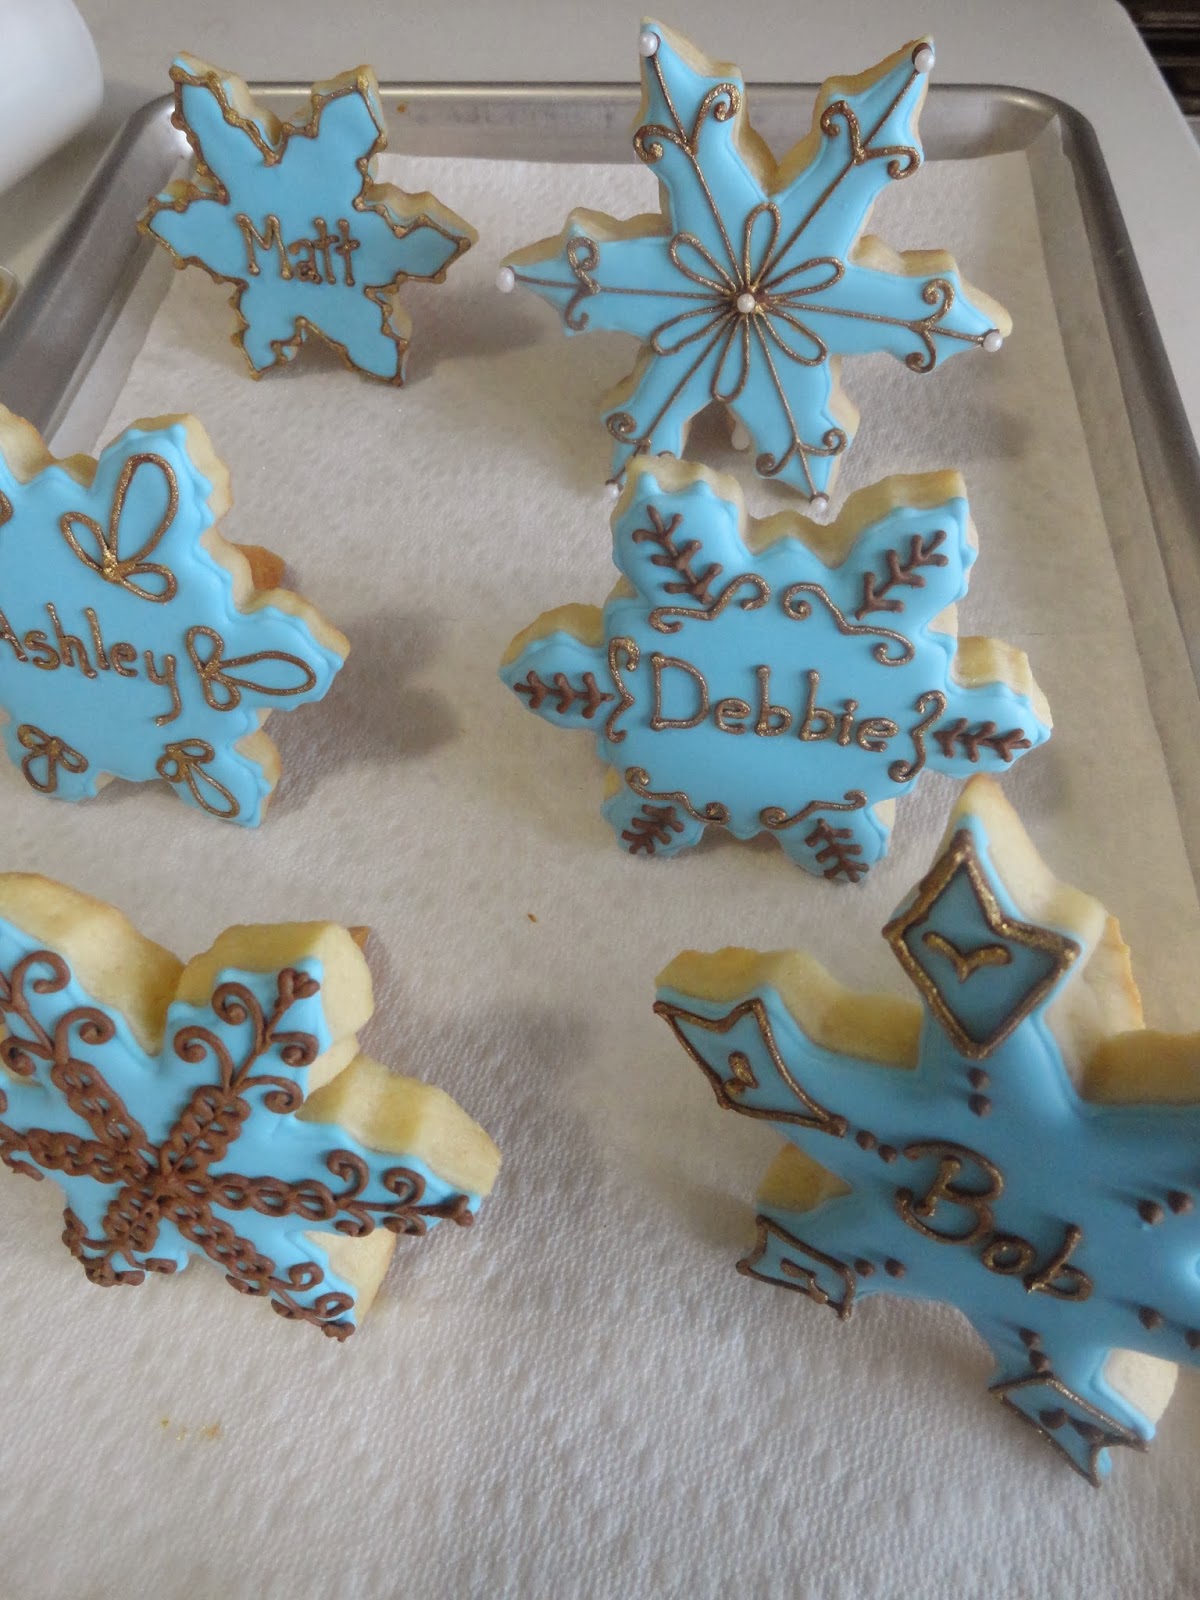
Any way, today you better stay with me because I made these Snowflake Cookies Place Cards for The Cookie Cutter Company and I loved the way it turned out.

These place card cookies will be an unexpected touch to dress up your holiday table!
I am sure your guest will be very impress.

To make these Place Card Cookies you will need:
.Already bake and decorated cookies ( any shape will do great)
.Stiff royal icing
.Small pairing knife
.Cookie triangles
.Baking sheet
The Cookie Cutter Company put together a snowflake set in their shop for this holiday season I thought it would be fun to use them for my cookie place cards, but the same technique can be use with any cookie shape.
-Make your cookie dough as usual, put it in the refrigerator to get cold for about 15 minutes.
-Using a pairing knife, cut some triangle pieces.
These cookie triangles are going to be the stands that hold up the place card cookies. Make sure you cut the triangles in a way that the cookie will lean back slightly when you stick the triangle piece to the cookie.
-Bake your triangle pieces.

-Pipe some stiff consistency royal icing using a #2 tip to the triangle cookie and apply it to the back of your already decorated cookie.

-Apply pressure to make sure the triangle and cookie sticks together.

-Put the place card cookies on a baking sheet or flat surface and let them dry for a few hours before handling the cookies.

Now you have your place card cookies ready to impress any guest. Not only they are beautiful , but also edible!


Wondering what cookie cutters and supplies I used for my cookies ?
Cookie cutters: Snowflake 3.75' -Snowflake 4'-Snowflake 5'-Mini Snowflake 1.5"
Tip #1 and #2
Icing bags
Squeeze bottles
White, brown and royal blue Americolor royal icing
White sanding sugar and White sugar pearls
Gold luster dust,Vodka and a small paint brush
This post is about making the place card cookies, but I didn't want you wondering about how I decorated the cookies.
Outline your cookies

Flood them and let them dry overnight

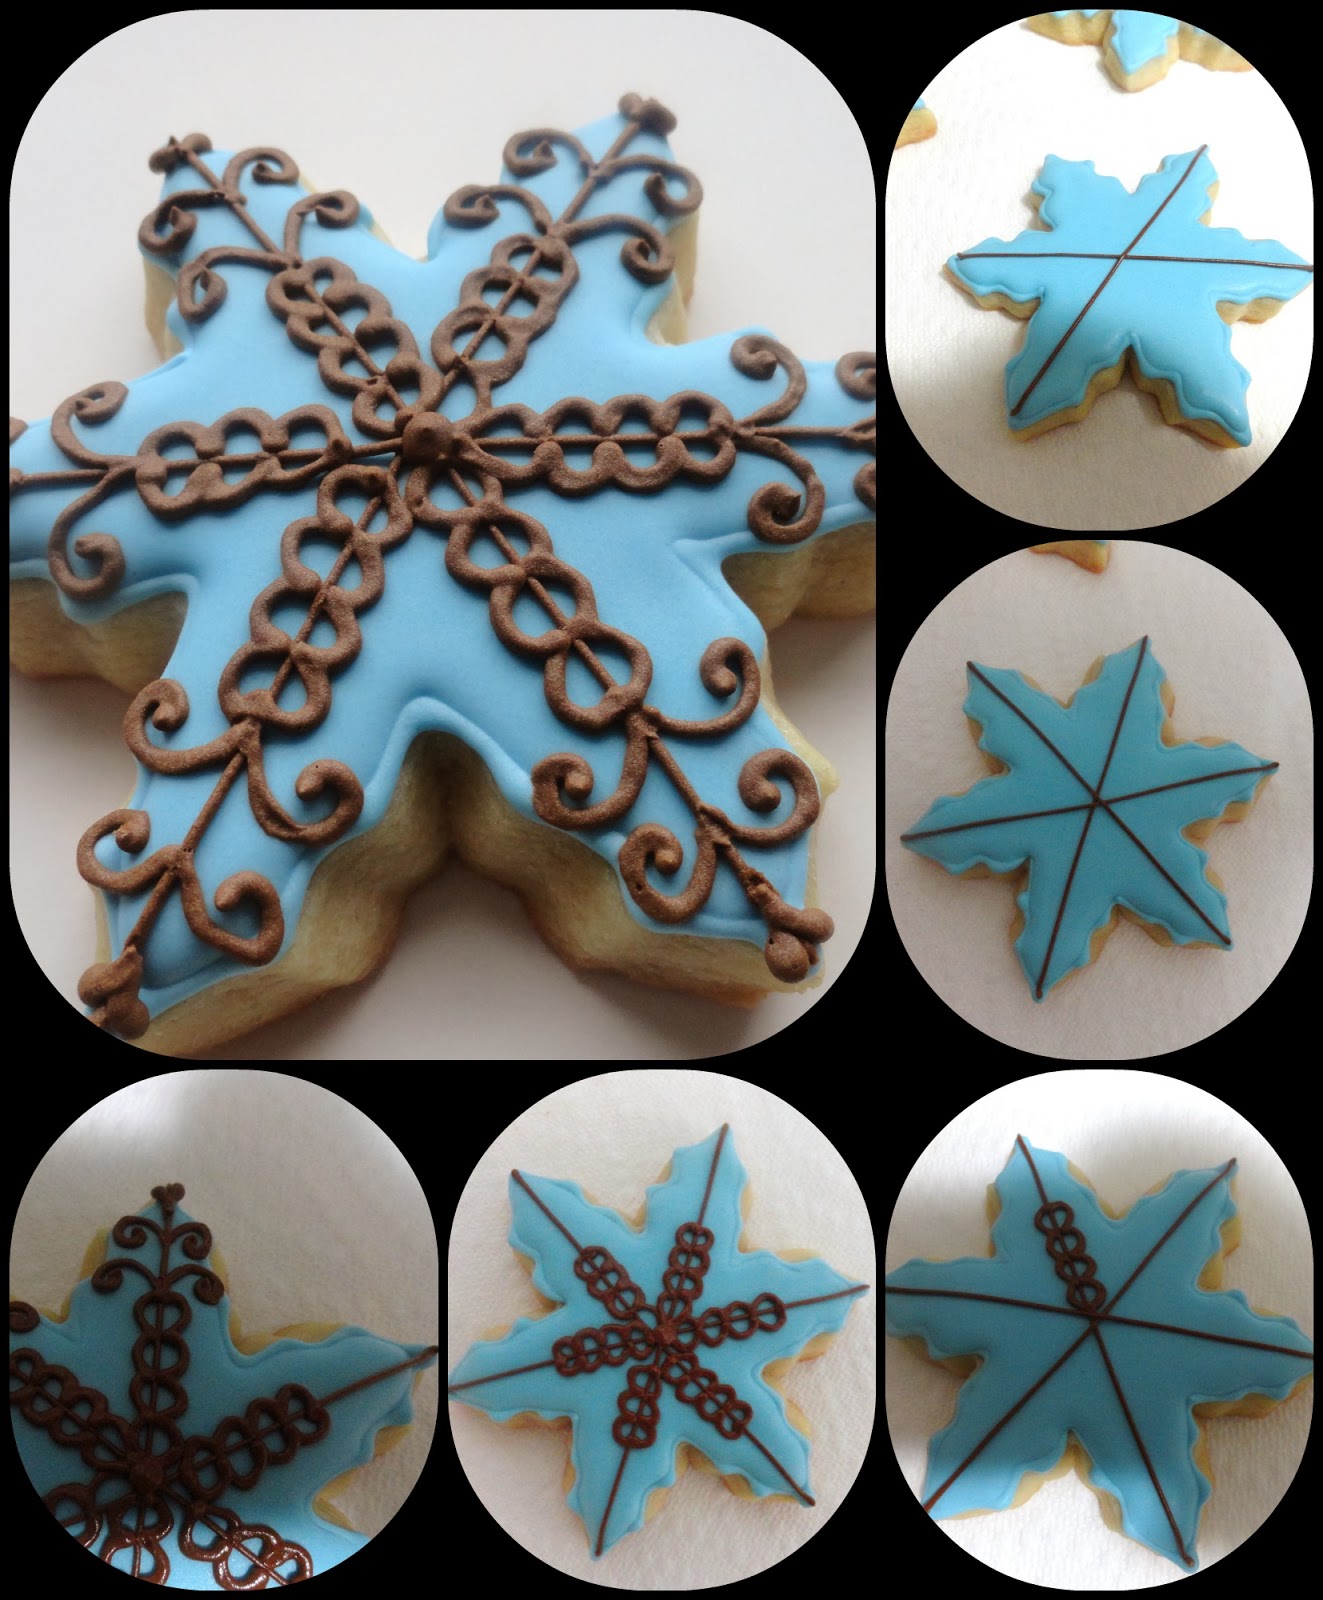
Keep in mind that the cookies should be completely dry before adding the detail. I used stiff icing and tip #1 to pipe the brown border and name on all the cookies.


A few tips decorating these cookies:
When you pipe any design , I would recommend you start from the inside out. Lines, oval shapes and swirls will add a lot of details to your snowflakes. Be creative, and do not worry about messing up, after all is just a cookie.

Use tweezers to drop white sugar pearls while the brown icing is still wet.


Let the detail on the snowflake cookie dry completely before applying the gold paint.
To paint the details, mix a few drops of vodka with gold luster dust and use a small paint brush to carefully paint the border or your guest name.


Thank you for stopping by!!


1 comments:
I wish I had thought of Christmas place cards, these are so pretty! I love the blue and gold adds a nice shimmer. Beautiful!
Post a Comment
Thank you for taking the time and leaving a comment.I really appreciate it.