Thursday, March 31, 2011

For the Cricut Cake Machine Lovers-Cricut Cake Online Classes

This is a Sponsored post written by me on behalf of ProvoCraft for SocialSpark. All opinions are 100% mine.

Many times I have mentioned that I love my Cricut Cake  machine. It was a gift from my husband last year for Mother's Day, see, I am kind of weird! I do not ask for shoes or jewelry, I ask for cake tools. 

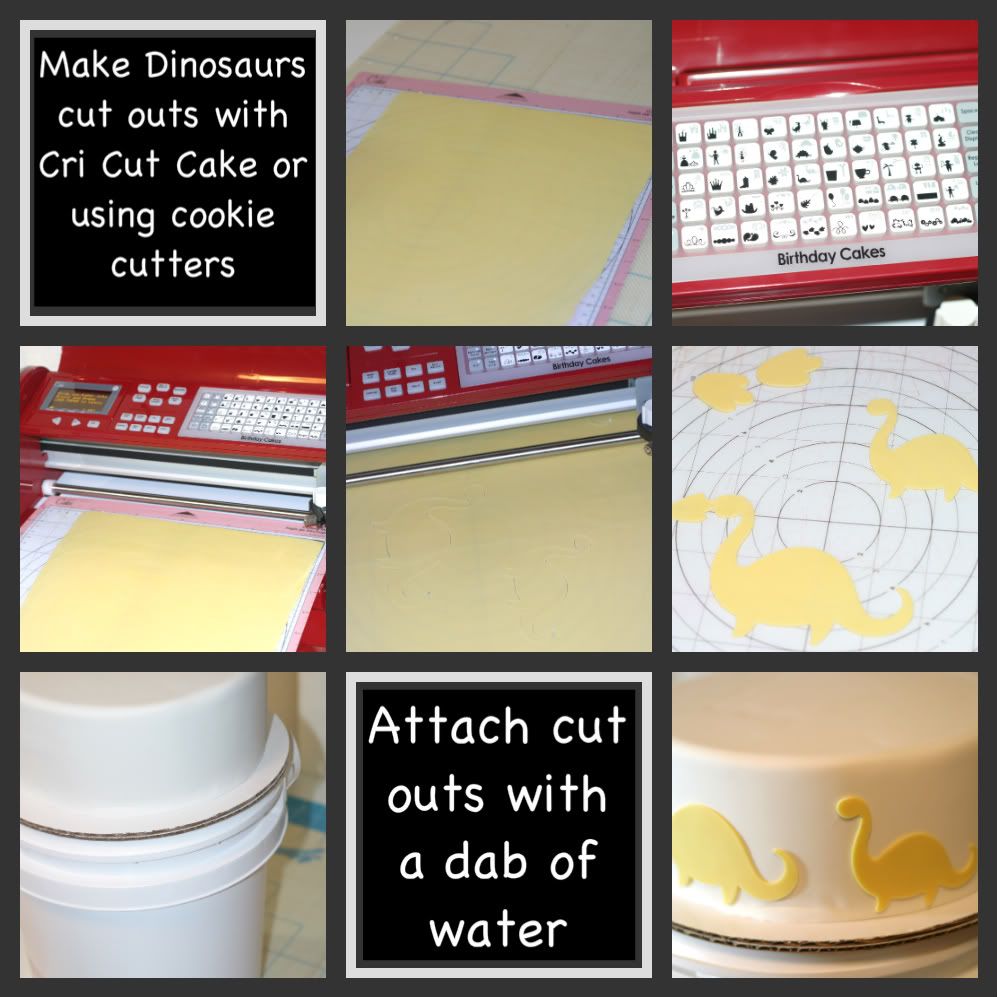
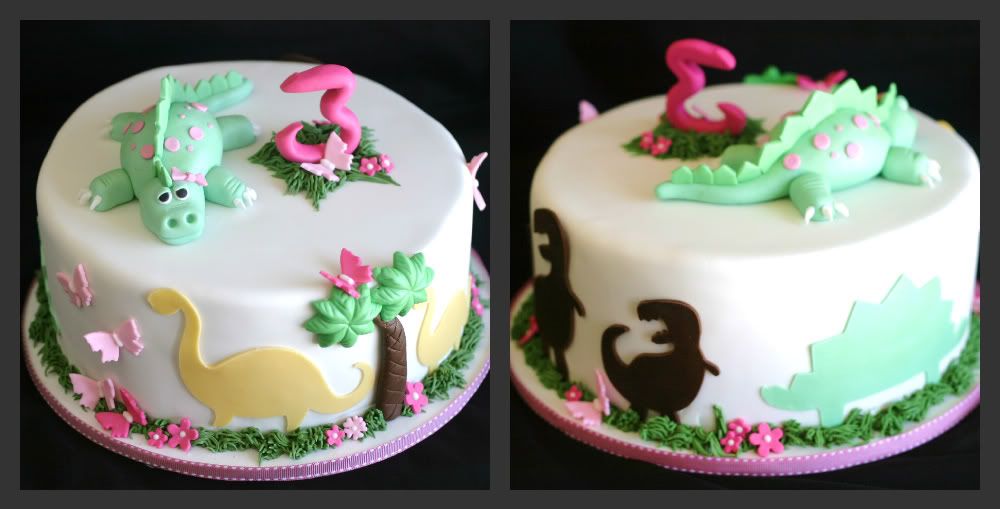
I use my Cricut Cake   to get specific shapes, borders,to make cupcake toppers and embellish my cakes. Do you remember this Dinosaur cake that I made for a little girl's birthday? 

I decorated the cake with the Birthday Cakes cartridge which is filled with an assortment of layered images with themes such as princesses, princes, dinosaurs, robots, and more. The best part is that you can personalize your creation even further with the included font and phrases that comes with the cartridge. 

 Photobucket

Photobucket

If you are new to cake decorating a great opportunity is here for you.

This week, March 30th and March 31st Provo Craft is hosting FREE online cake decorating classes using the very new  Cricut for cakes! If you own a Cricut and have trouble using it or you have been thinking about getting one , this is the time to join the class and learn more. You can go here to register , space is limited.

These classes are being taught by Jinger Adams a celebrity in the crafting world! Google her if you're unfamiliar and you'll see her accomplishments are quite impressive!

Do you own a Cricut Cake? If you don't ,what kind of decorations would you use if you had a Cricut for Cake?


Visit Sponsor's Site

For the Cricut Cake Machine Lovers-Cricut Cake Online Classes

This is a Sponsored post written by me on behalf of ProvoCraft for SocialSpark. All opinions are 100% mine.

Many times I have mentioned that I love my Cricut Cake  machine. It was a gift from my husband last year for Mother's Day, see, I am kind of weird! I do not ask for shoes or jewelry, I ask for cake tools.
I use my Cricut Cake   to get specific shapes, borders,to make cupcake toppers and embellish my cakes. Do you remember this Dinosaur cake that I made for a little girl's birthday?
I decorated the cake with the Birthday Cakes cartridge which is filled with an assortment of layered images with themes such as princesses, princes, dinosaurs, robots, and more. The best part is that you can personalize your creation even further with the included font and phrases that comes with the cartridge.
 Photobucket
Photobucket

If you are new to cake decorating a great opportunity is here for you.

Today March 31st Provo Craft is hosting FREE online cake decorating classes using the very new  Cricut for cakes! If you own a Cricut and have trouble using it or you have been thinking about getting one , this is the time to join the class and learn more. You can go here to register , space is limited.
These classes are being taught by Jinger Adams a celebrity in the crafting world! Google her if you're unfamiliar and you'll see her accomplishments are quite impressive!
Do you own a Cricut Cake? If you don't ,what kind of decorations would you use if you had a Cricut for Cake?


Visit Sponsor's Site

Tuesday, March 29, 2011

Chanel Shoe Box Cake

Happy Tuesday, are you having Spring weather were you are? If you do, you are lucky! around here the past few days  have been windy and very cold.
I have been living in this country for many years and I can't get used to this weather. My little girl is so looking forward for a warmer weather that she keeps singing "Rain,rain go away and come back another day, the funny thing is that is not even raining is just cold :)
Any signs of Spring where you are?

Well, into this cake.
I made it for a Bridal Shower, the bride is a totally fashionista and she has deep love for designer shoes, her sister provided me with a picture of a Chanel shoe box and the shoe they wanted.
The shoe box cake was very simple to make, the regular standard shoe box made with marble cake and vanilla buttercream. I covered with back fondant, added the "tissue paper", the fake lid ( I used styrofoam) and the box was ready.
The tricky part was the flat Chanel shoe, I promised myself I wasn't going to make any more shoes, they are so time consuming and people sometimes have such a tight budget that they can't afford it. This shoe was totally in the budget ( happy dance) and I had so much fun making it. I was so excited that I even made a tutorial for you, hopefully I will put it up soon.


I made the shoe with a combination of  rice crispy treats, modeling chocolate and gumpaste.
For this order I also made cookie favors for the guest, my idea was to imitate the flat Chanel shoe using the flip flop cookie cutter, the results were ok, but not what I was expecting.
I have to say that my client was thrill when she saw the cake and cookies, well that's what it counts right?

Have a wonderful week and thank you for stopping by.

Monday, March 21, 2011

Gold and light ivory 50th Birthday Cake


I have to say that this is one of those cakes where your client hands you a picture and say: I want you to replicate this cake.
The issue is that the budget is tight, the cake is for a 50th birthday party for my client's boyfriend's dad  and  I want to do my own design inspired by somebody else's cake.
I handed 3 sketches to my client for approval, they included blue, sparkling blue and no bow. I really liked them and I thought I had a winner, I had my favorite in mind. But it turns out that none of them were selected and we went back to the original picture.
Gold painting is expensive, besides hand painting is very time consuming and budget was tight, so this is what I came out with.
When the cake was done, without the numbers and the stars it looks to me like a small version of a wedding cake and if I say that I didn't panic, I would be lying. Then I added the stars and numbers and it look exactly like what my client wanted.
Hey, if my client is getting what they pay for and they are happy, that means my work was done!


Friday, March 18, 2011

Hot Pink Zebra Cookies for a Special B-Day Girl

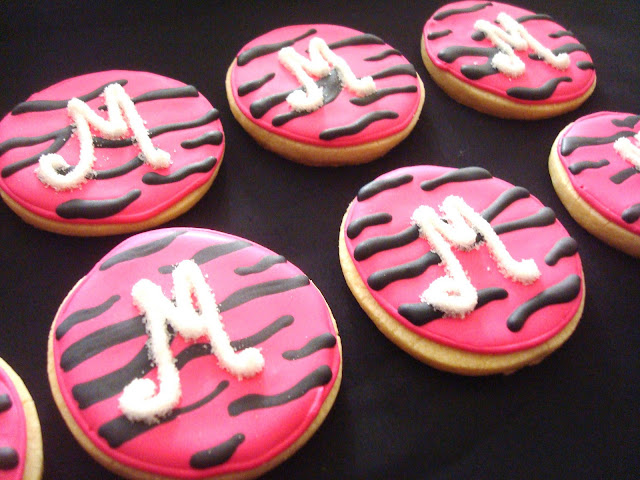
My first try making Zebra cookies, these are the first ones and they don't look that bad, hopefully next time I can do better. I made these cookies to match the party and cake for a very special birthday girl, my blog friend Raychel's daughter.The theme for the party was Zebra Diva and these cookies were perfect as party favors.Raychel not only makes beautiful tutus but she is so creative in many ways,she did a great job with the party decor, and the cake for the party was amazing.


Thank you for stopping by, have a great weekend.

Tuesday, March 15, 2011

Cupcakes, Spring Birthday Party and a Guest Blogger

I am so excited to introduce you to my real life bloggy friend Tina. If you love homemade cards and anything crafty head over to her blog to find her amazing work. Tina has a passion for anything vintage, she is a talented crafter, a wonderful friend and an incredible mom of two adorable kids.
I am so happy to have her here today showing us the details she made for her little girl's birthday party, in which we were a guest and had the most wonderful time ever.

..................................................................................................................................................................
I'm so happy to be a guest blogger today at Kathia's amazing blog! I won't be sharing any great baking tips with you today--actually, I'm a pretty bad baker! So needless to say, it's great having a super baker, like Kathia, for a friend. She's always helping me when it's time for one of my kids' parties by gracing us with one of her amazing creations.
As for me, I'm a crafter and my media of choice is paper. I love making cards and holiday decorations, I have a passion for repurposing anything old into something new and I'm crazy for vintage and love to find ways to use vintage images in my crafting.
I'm here today on Kathia's blog to talk about planning your party with a theme. Party planning is relatively new to me, but I had such fun creating decorations for my daughters 1st birthday that I wanted to share a few tips on just how to pull everything together for your next party.
When I first started thinking about what I wanted for my little girl's 1st Birthday party this year, I had a few particular things in mind; my favorite girlie colors, butterflies and the expectation of Spring-- from there  my theme for my party decorations and goodies emerged. I knew I wanted to incorporate the sweet elements of Spring into our party's decor to give our guests a real treat after our long and harsh Jersey winter.
A few  die cuts layered together make a great embellishment for a simple glassine bag filled with sweet treats. The glassine bags are very inexpensive and can easily be bought in bulk, which makes them great goodie bags and they would also work well for cookies.
Since this party was for adults and children, I wanted to make sure my smaller guests had some extra special favors to take home with them too.
Again sticking with my theme I made Butterfly fairy wands for all our little girl guests.

And pinwheels for all our little boy guests.
Centerpieces are a great way to highlight your party's theme. I had so much fun making my centerpieces and it was a great way to pull all your favorite design elements and colors together. Again, you see my butterflies and pinwheels.
No birthday party is complete without some sweet baked goodies. Kathia, being the friend that she is, supplied these gorgeous cupcakes for the event. She knew what I had in mind and she incorporated those ideas into her cupcake decorating.
Here's her receipe for that lovely pink icing;
Quick Pour Icing
Ingredients
6 cups confectioners' sugar, sifted
1/2 cup water
2 tablespoons light corn syrup
DirectionsIn a saucepan, combine confectioners' sugar, water and corn syrup. Cook over low heat, stirring constantly, until it reaches a temperature of 92 degrees F (33 degrees C.) Mixture should be thin enough to pour, but thick enough to coat cupcakes.
To cover cupcakes: Take the cupcake and dip it upside down in the hot icing. Carefully shake the excess of icing off. I dipped the cupcakes so the icing sticks to the cupcakes liners .
Set the cupcakes aside and let them dry. If you like you can give them a second coat when the first one is dry.
Attach your chosen decoration on the cupcakes with dots of royal icing or light corn sirup.

Of course, you can easily go to the party store and buy the balloons and matching party sets--but if your looking for that extra special touch then making one of a kind decorations or finding someone that can put a look together for you is the way to go.Thanks you so much for taking the time to read this post. I hope your  found some inspiration for planning your next party! Please make sure to stop by my blog Vintage Haven Studio for a tutorial on how to make your own Butterfly Fairy Wand .
Thursday, March 10, 2011

More Cupcake Cookies and shipping thoughts


I love making cupcakes cookies, the possibilities are endless and you can use so many colors.I feel people always tent to go for the pink, but I I have seen many cupcakes cookies using unconventional colors and they are adorable.
I made these cookies for a birthday party, I made 2 sizes, the larger ones were given as cookie favors and the smaller ones were mean to eat at the party.


These other cookies were for a Cupcake Theme Baby Shower in MA. 

Shipping cookies is very stressful, I always pack them so well and I have never had any problems so far. ( crossing fingers here).But as soon as I leave the box in the hands of the carrier I feel already stress.It doesn't matter how much packing peanuts,bubble wrap or air packets I use, I can't be in pease until I hear from my client. If you sell your cookies...  Have this ever happened to you?


Monday, March 7, 2011

Blue and Brown Baby Shower Cake

My little girl's former teacher is having a baby and these past weekend was her Baby Shower. Since the day I found out she was pregnant I offered her the Baby Shower cake.Miss S is such a wonderful and caring teacher and my daughter loves her. When I asked Miss S what  kind of cake she wanted she just said that she wanted a cake with a baby cake topper. So this is what I came out with.
I made the baby's face with a mold that I got at one of my classes, for the hair I used royal icing.
The pillow and the blanket are made out of fondant.


I added chocolate brown polka dots in two sizes and a few baby clothes around the cake.

Well, I hope you like it. Have a great week everyone.

Tuesday, March 1, 2011

Decorating a simple cake

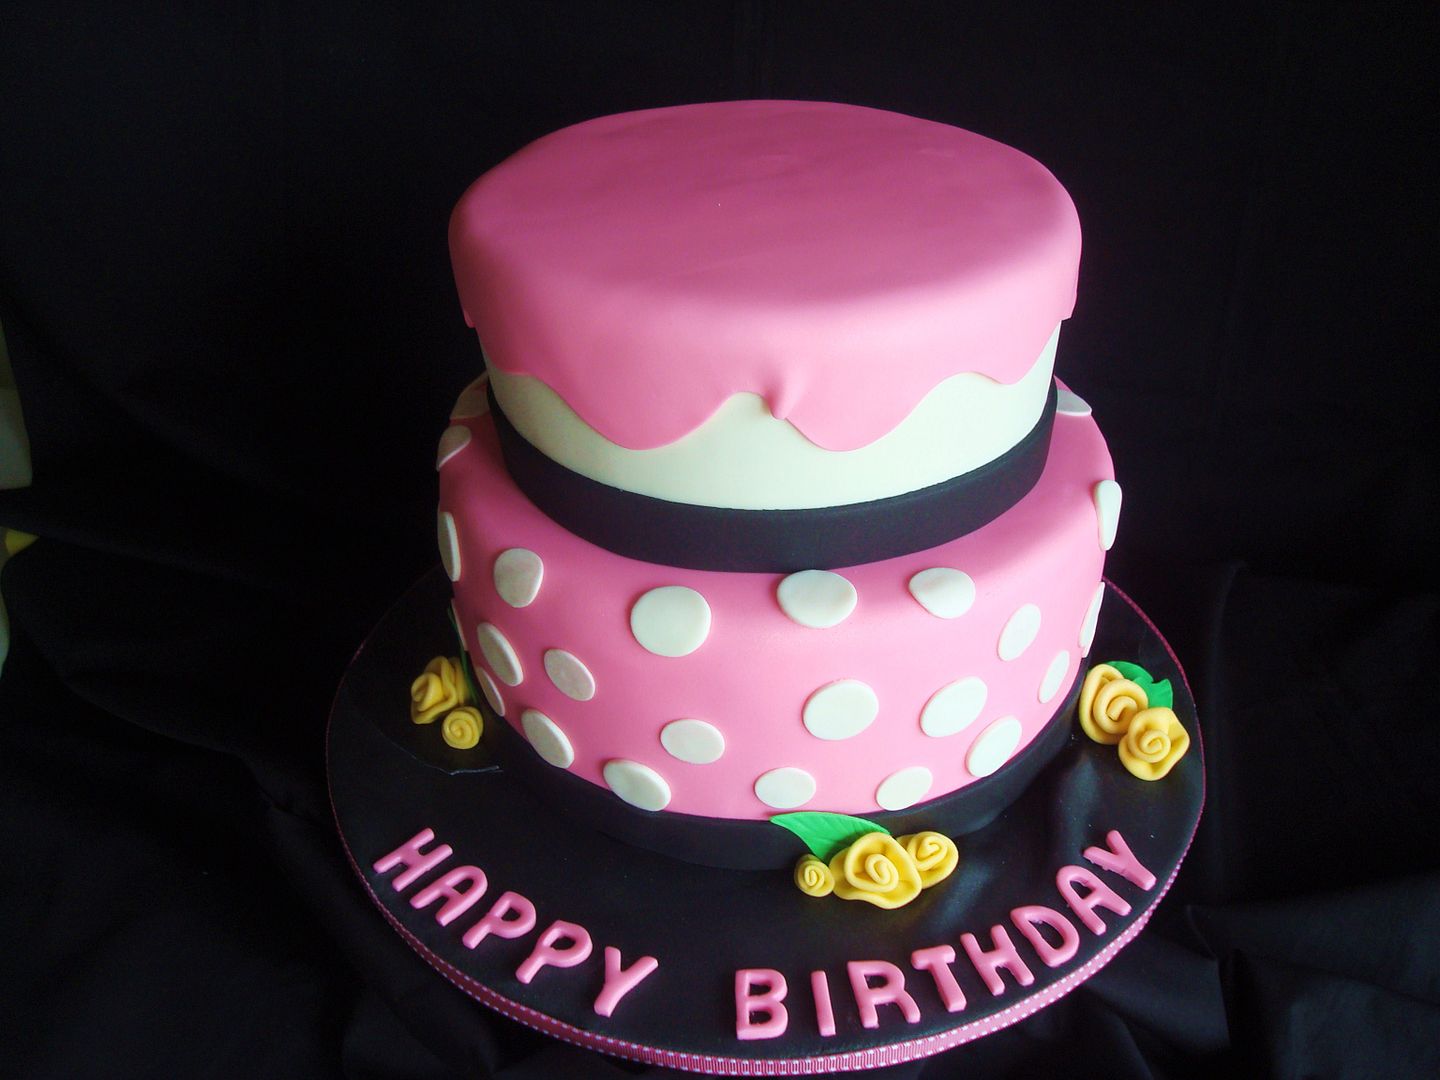
I am sure you have seen this cake design here before. This is a very popular cake that I make using the Minnie Mouse cake topper on top of the cake to complete the perfect Minnie Mouse party. For this particular cake, the mom wanted to use a paper Minnie Mouse cake topper with yellow details and she ordered the plain cake. I call it plain because to me is missing my sugar Minnie to complete the look. But you know how things are... and I just did what was requested just changing the colors of the roses from pink to yellow to match the topper.

This cake didn't take to long to decorate.
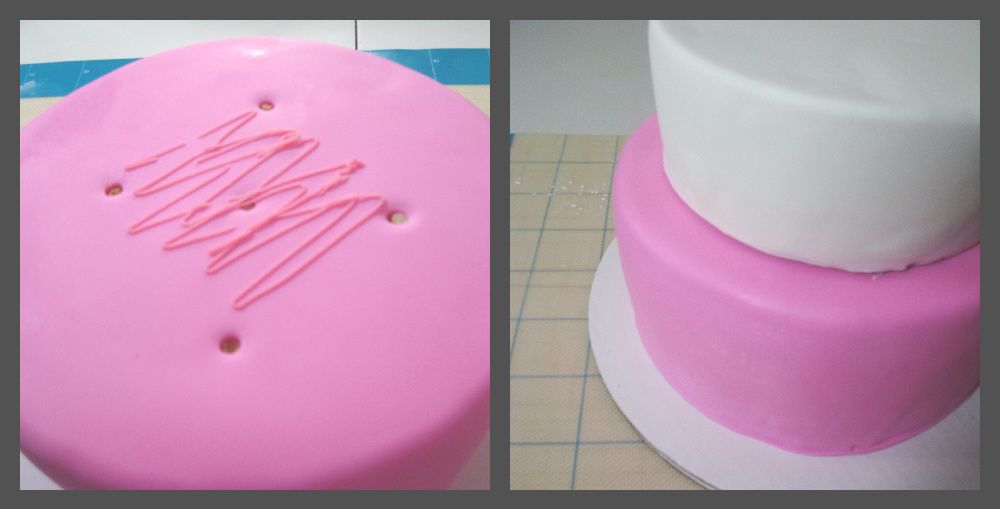
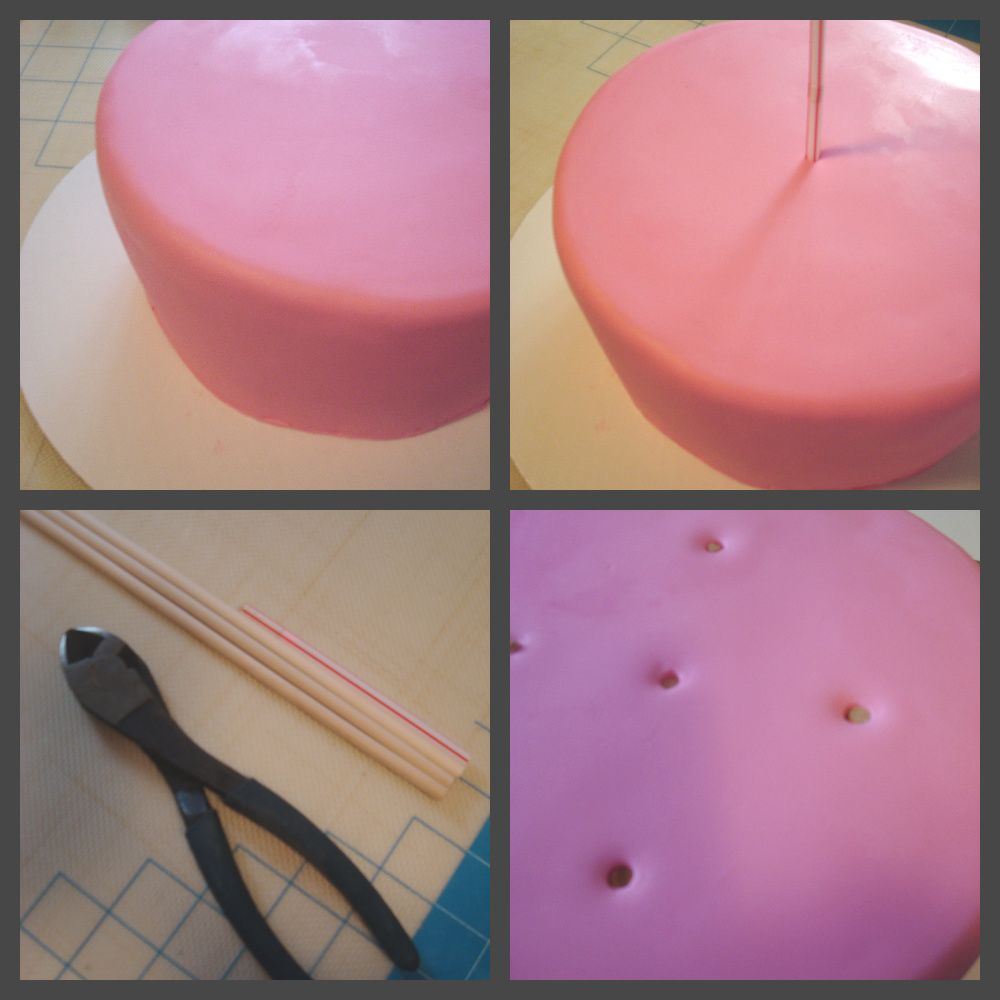
-I covered the first tier in pink fondant and I attached it to the board with a little royal icing
-The first tier needed some support and I used a straw to measure the size of the dowels that I was going to insert.
- I  normally use plastic dowels but it turns out that I didn't have any more so I used wood ones.

Photobucket

-I used  royal icing to "glue" and position the top tier on the base tier.

Photobucket

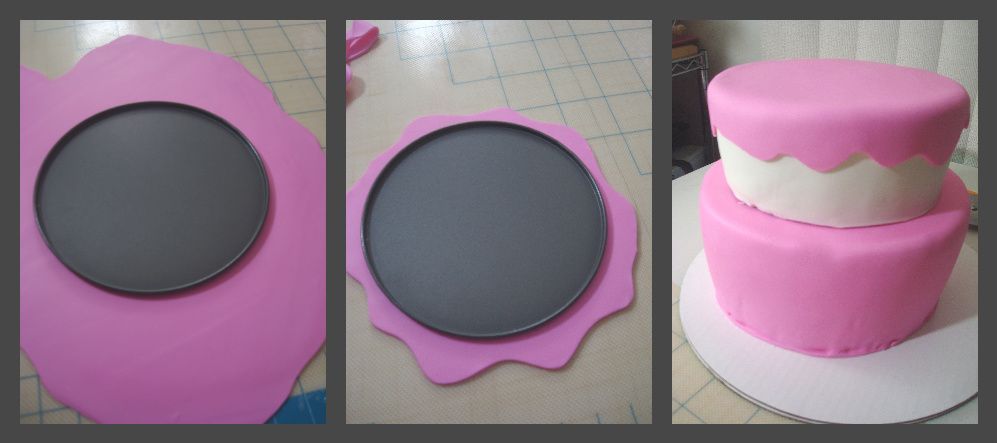
I don't even know how can I call the "pink top" that I used on the top of the cake, but here are the pictures for you to get an idea how I made it.
Photobucket

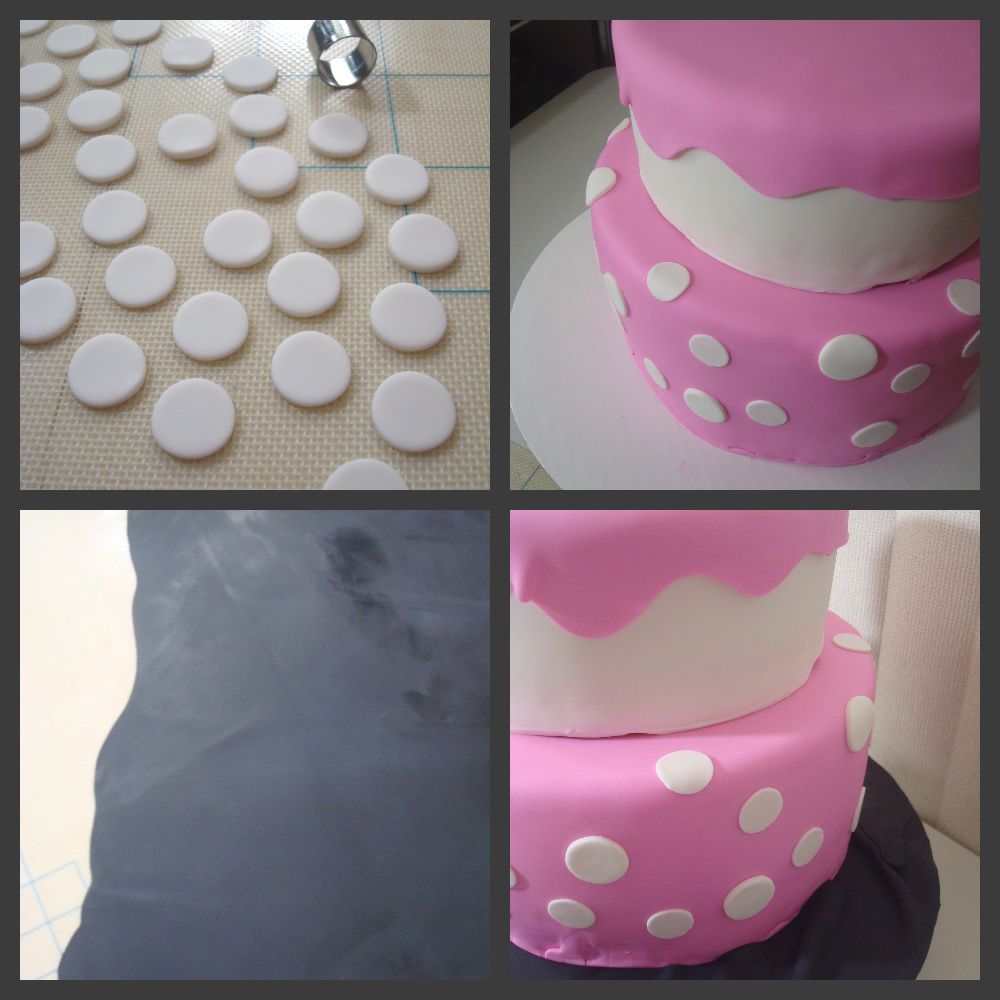
-Make the polka dots and attach them to the cake with a dab of water.
-Roll black fondant very thing and cover the board ( you can also cover the board first if you want)

Photobucket

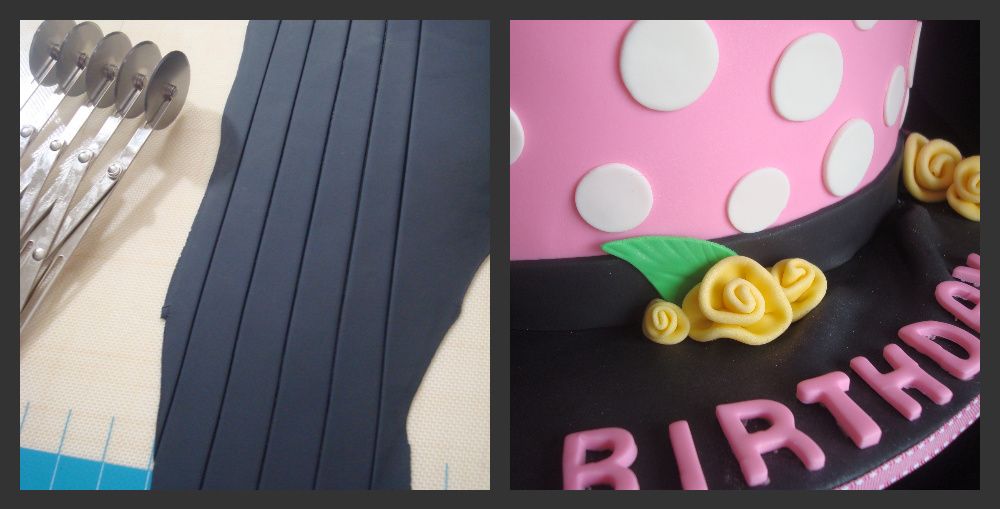
I used one of my most precious tools to make the cake border, the multi pastry wheel cutter.I also attach it to the cake with a dab of water.
Photobucket

-Make the roses ( here is a video where you can see how easy to make they are)
-Add a few leaves
-Cut and position the Happy Birthday letters and you are done!
Photobucket